Serial Numbers can be assigned to partner products to provide further tracking information alongside Attributes and Batch Numbers.
Products with this configuration support serial number scanning via the warehousing app when being Picked or Received into the Warehouse.
Defining a Serial Number Product
To define a Serial Number product, create a product in Consignly and ensure that the Serial numbers supported checkbox is checked.
go to Partners from the left hand menu bar, then open the partner that the product belongs to. Next, navigate to the Products tab and click Create Product. Enter the product details and select Serial Numbers, when complete click and Create Product.
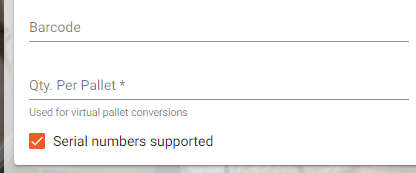
The create product screen with the serial support checkbox checked
Products with Serial Numbers can be identified in the Partner Products list by the Serials icon.
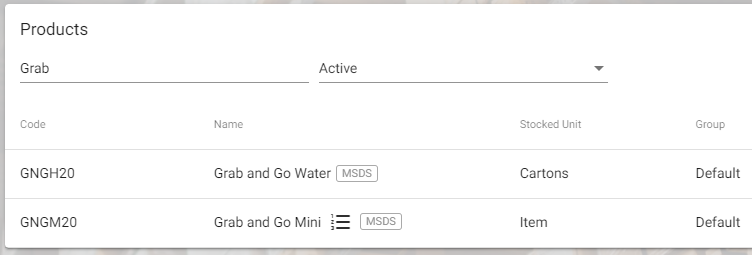
The product index showing "Grab and Go Mini" as a serial number supported product
Adding Serial Numbers to Consignments
Serial Numbers on Inwards Consignments
Serialised products that come in via inwards consignments will require serial numbers to be entered.
To do this, select the serialised product via the Edit Products card. Selecting a product with serials will automatically raise the Edit Product Items dialog.
This dialog allows you to enter a line for each serial number, as well as set individual Volume and Weight measurements. Consignly will default the volume and weight data based on what has been defined on the product.
If you have a list of serial numbers to add to the consignment, simply copy them (ensure it is one serial number per line) and paste the serial numbers into the first serial input. Consignly will then automatically create a line for each item.
There is no need to enter any quantity, as serialised product is assumed to be one serial for one item.
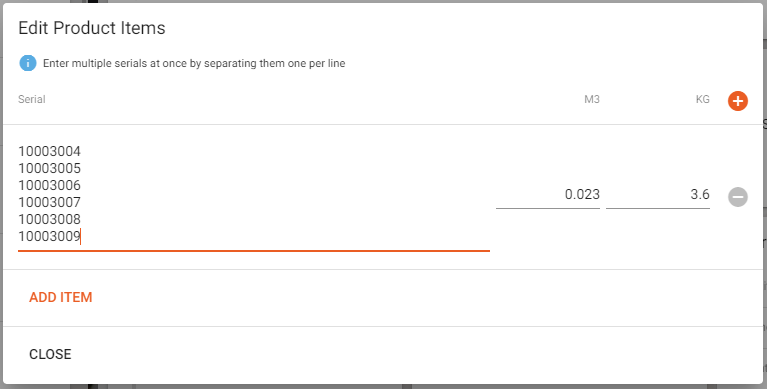
Enter serials one-per-line and Consignly will automatically create a line for each serial
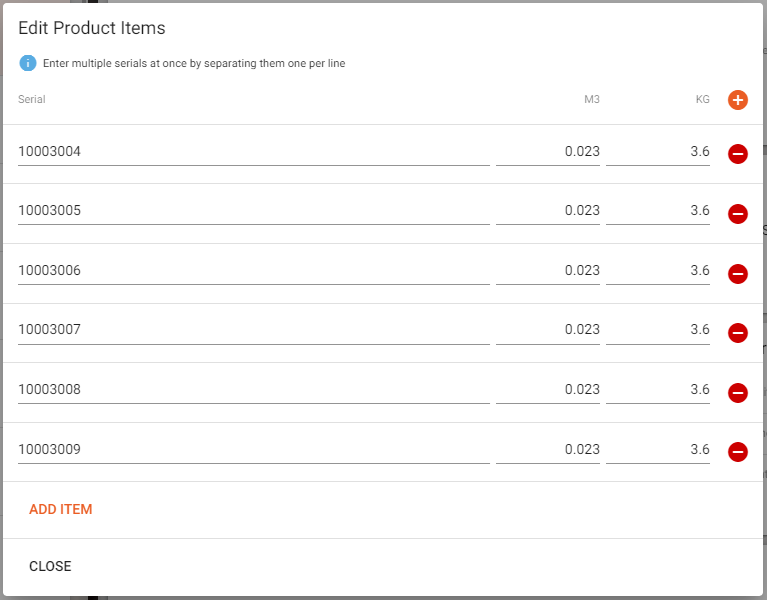
Consignly splitting the serials into separate lines
Receiving Serial Number Products
Serial numbers can be received either via the portal or via barcode scanning using the warehousing app.
Receiving Serial Numbers via the Portal
Once serial numbers have been added to a consignment and the consignment status has been changed to Ready to Receive they can be marked as received. To receive the product locate the Consignment Products card and click Receive.
The receive button in the shoulder of the Receive Products card
Once in receive mode, check the box next to the items being received. By default, checking the box will select all serial numbers. If you want to receive a sub-set of the serials, choose the Serial Numbers icon.
To select specific serial numbers, check the box next to each serial number being received.
If the serial number being received is different to what is expected, the serial number may be overtyped to change it. Volume and Weight may also be changed.
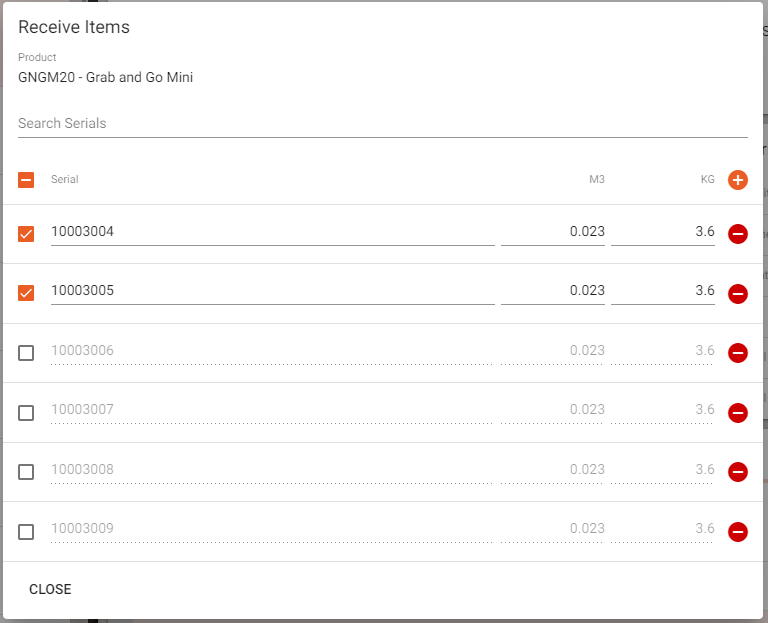
The serial selection dialog in Consignly
When the serials have been selected, close the dialog and press the Receive Selected button to receipt the inventory into the warehouse.
Receiving Serial Numbers via the Warehouse App
To receive serial numbered inventory via the warehouse app, tap into the inwards consignment.
The app will present you with a list of products to receive. Scan the product barcode or the serial number and Consignly will navigate you to the receive screen for that product. If you scan the serial number Consignly will automatically select that product to receive.
Repeat this for as many products as you wish to receive.
Tap the Receive Selected button when you're ready.
A serial number successfully scanned and verified by the warehouse app
Serial Numbers on Outwards Consignments
If a Serial number product is selected to be added to an Outwards consignment, then serial numbers associated with that product must be selected.
There are two ways to do this, either by selecting one or more specific serial numbers by entering them in the Serial Numbers field on the Add Inventory dialog.
Alternatively enter the quantity required and Consignly will select a subset of serial numbers for you based on the stock rotation and depletion methods.
Once you have confirmed your selection click Add Selected to add the chosen serials to the consignment.
Consignly automatically selecting serials based on a requested quantity
Picking Serial Number Products
Serial numbers can be picked via the portal or via barcode scanning using the warehousing app.
Picking Serial Numbers via the Web Portal
Once an Outwards consignment status has been changed to Ready to Pick serial numbers can be marked as Picked. To Pick Serials locate the Products card and click Pick on the product row.
Once serial numbers have been added to a consignment and the consignment status has been changed to Ready to Pick they can be marked as Picked. To pick serials locate the Consignment Products card and click Pick.
The pick option in the shoulder of the Products card
Once in pick mode, check the box next to the items being picked. By default, checking the box will select all serial numbers. If you want to pick a sub-set of the serials, choose the Serial Numbers icon.
To select specific serial numbers, check the box next to each serial number being picked.
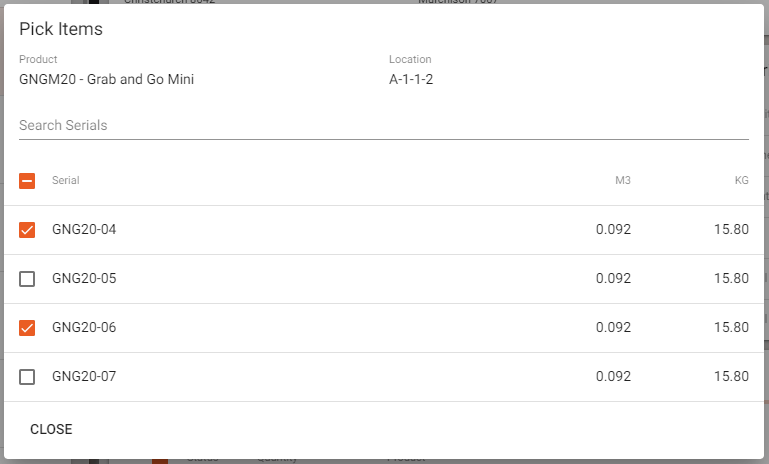
Optionally choose specific serial numbers to pick via the Pick Items dialog
When the serials have been selected, close the dialog and press the Pick Selected button to pick the inventory from the warehouse.
Picking Serial Numbers via the Warehouse App
To pick serial numbered inventory via the warehouse app, tap into the outwards consignment.
The app will present you with a list of products to receive. Scan the product barcode or the serial number and Consignly will navigate you to the receive screen for that product. If you've scanned the serial number, Consignly will automatically select that product to pick.
Repeat this for as many products as you wish to pick.
Tap the Pick Selected button when you're ready.
A serial number being scanned and verified via the warehouse app
Adjusting Serial Warehouse Products
To adjust a product visit your Inventory.
Find the product to adjust and open the action menu and choose Adjust Product.
The action menu in the Inventory screen
In the Product Adjustment you can enter the new metrics for any inventory in the warehouse. The Particulars field is used to describe the reason for the adjustment such as miscount or stock-take.
Quantity cannot be adjusted for Serial Number products directly, instead Serial Numbers can be added or removed to change the count. Metrics for Volume and Weight can be edited, where the values entered represent the value for that serialised item.
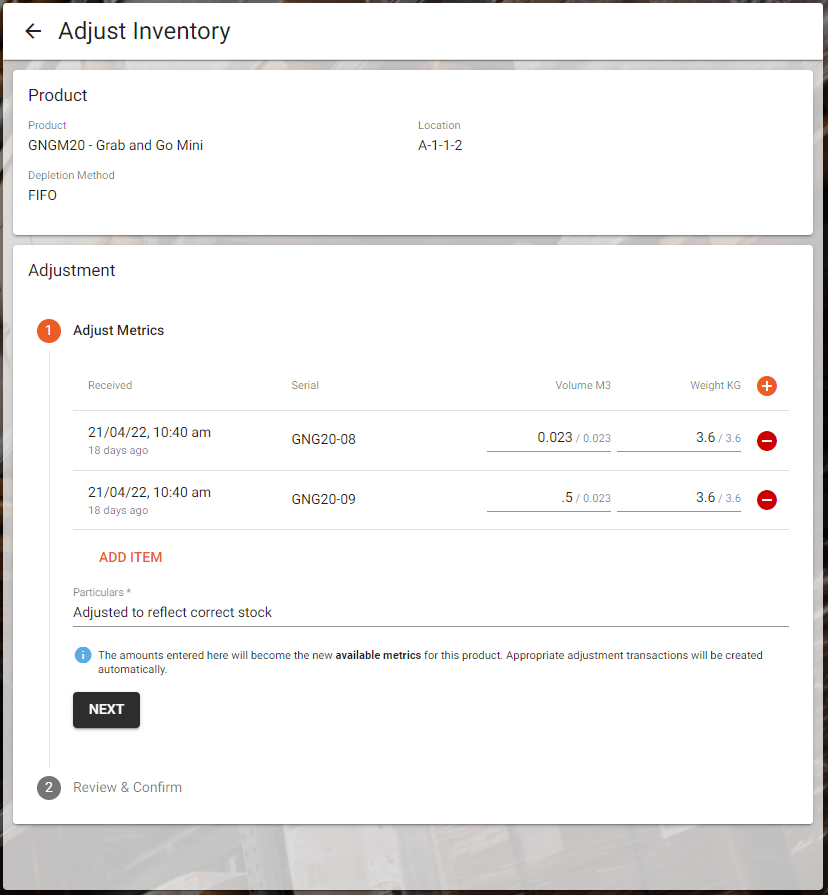
The input screen allowing users to adjust metrics of serialised inventory
Once the appropriate adjustments have been entered, choosing Next will display a summary of the changes, including the movement direction, value for each metric and any Serial Numbers which have been added or removed.
Choose Adjust Product to complete the process.
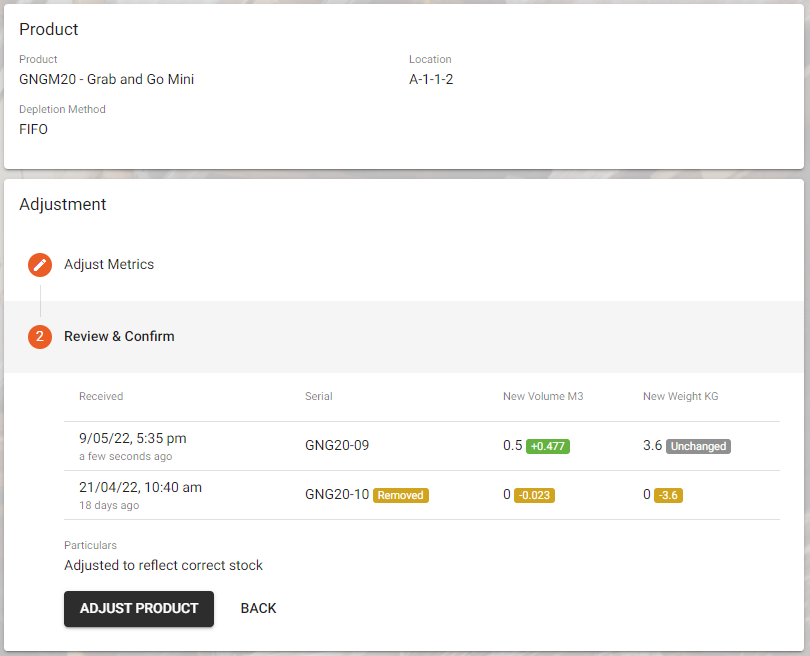
The screen allowing users to review and confirm any inventory adjustments
The adjustment will then be shown as a transaction under the partner product in the warehouse including a list of the affected serials.